
이번에는 안드로이드 4대 컴포넌트 중 서비스에 구현방법 중 bind타입방식을 알아보겠다.
연결타입의 Service는 클라이언트/서버 구조로 생각하면 쉽다.
Service에게 컴포넌트가 연결을 하면 컴포넌트가 클라이언트 서버가 Service가 된다.
이제 컴포넌트가 Service에게 요청을 하면 Service는 그에맞는 결과값을 리턴한다. 클라이언트가 연결을 해제하고,
더 이상 Service와 연결된 클라이언트가 없다면 Service는 자연스럽게 종료된다.
또한 bind타입 Service는 앱 내부의 기능을 외부로 제공할 때 사용한다.
즉 "프로세스간 통신을 지원한다".
우선 bind타입 Service를 구현하기 위해선 Service를 상속 받아 onBind()함수를 오버라이딩한다.
onBind()함수는 IBinder 객체를 반환한다. IBinder는 서비스와 컴포넌트 사이에서 인터페이스 역할을 한다.
컴포넌트가 서비스에게 연결요청을 시도하면, 서비스는 IBinder를 반환하여 서비스 자신과 통신할 수 있도록 한다.
다음 Service를 상속받은 BoundService를 보자.
BoundService는 onCreate(), onBind(), onDestroy()함수를 기본적 오버라이딩한다.
onStartCommand()함수는 Start타입에서 사용됨으로 신경쓰지 않아도 된다.
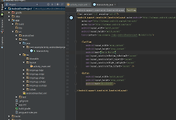
public class BoundService extends Service {

    IBinder mBinder =  new MyBinder();


    public class MyBinder extends Binder{
        //서비스 객체를 리턴.
        public BoundService getMyService(){    return BoundService.this;  }
    }


    @Nullable
    @Override
    public IBinder onBind(Intent intent) {
        //액티비티에서 바인드서비스를 하면 호출되는 함수
        Log.d("BoundService","onBind()");
       // Toast.makeText(this, "서비스 바인딩", Toast.LENGTH_SHORT).show();
        return mBinder;
    }


    public int getRan() { // 임의 랜덤값을 리턴하는 메서드
        Log.d("BoundService","getRan()");
        return new Random().nextInt();
    }


    @Override
    public void onDestroy() {
        Log.d("BoundService","onDestroy()");
        super.onDestroy();

    }

    @Override
    public int onStartCommand(Intent intent, int flags, int startId) {
        Log.d("BoundService","onStartCommand()");
        return super.onStartCommand(intent, flags, startId);
    }

    @Override
    public void onCreate() {
        Log.d("BoundService","onCreate()");
        super.onCreate();

    }

}
클라이언트 즉 컴포넌트가 서비스에게 요청을 하면, 바인딩된 서비스는 임의 랜덤값을 리턴하는 것으로 서비스가 잘 동작하는지 확인하겠다.
또 바인딩서비스는 매니패스트에 추가해줘야한다. 나는 service패키지 아래 BoundService를 만들었기 때문에
아래와 같이 매니패스트에 서비스를 등록한다.
<?xml version="1.0" encoding="utf-8"?>
<manifest xmlns:android="http://schemas.android.com/apk/res/android"
    package="com.example.sqi.boundservice">

    <application
        android:allowBackup="true"
        android:icon="@mipmap/ic_launcher"
        android:label="@string/app_name"
        android:supportsRtl="true"
        android:theme="@style/AppTheme">
        <activity android:name=".MainActivity">
            <intent-filter>
                <action android:name="android.intent.action.MAIN" />

                <category android:name="android.intent.category.LAUNCHER" />
            </intent-filter>
        </activity>

        <service android:name=".service.BoundService"></service>


    </application>

</manifest>
그리고 서비스시작과 정지 , 데이터값 확인을 위한 버튼을 각각 만들어준다.
<?xml version="1.0" encoding="utf-8"?>
<RelativeLayout xmlns:android="http://schemas.android.com/apk/res/android"
    xmlns:tools="http://schemas.android.com/tools"
    android:id="@+id/activity_main"
    android:layout_width="match_parent"
    android:layout_height="match_parent"
    android:paddingBottom="@dimen/activity_vertical_margin"
    android:paddingLeft="@dimen/activity_horizontal_margin"
    android:paddingRight="@dimen/activity_horizontal_margin"
    android:paddingTop="@dimen/activity_vertical_margin"
    tools:context="com.example.sqi.boundservice.MainActivity">

    <Button
        android:id="@+id/button1"
        android:layout_width="wrap_content"
        android:layout_height="wrap_content"
        android:layout_alignParentLeft="true"
        android:layout_below="@+id/textView1"
        android:layout_marginLeft="14dp"
        android:layout_marginTop="46dp"
        android:text="서비스시작" />

    <TextView
        android:id="@+id/textView1"
        android:layout_width="wrap_content"
        android:layout_height="wrap_content"
        android:layout_alignParentTop="true"
        android:layout_centerHorizontal="true"
        android:layout_marginTop="34dp"
        android:text="서비스에서 데이터 전달 받기"
        android:textAppearance="?android:attr/textAppearanceLarge" />

    <Button
        android:id="@+id/button2"
        android:layout_width="wrap_content"
        android:layout_height="wrap_content"
        android:layout_alignLeft="@+id/button1"
        android:layout_below="@+id/button1"
        android:layout_marginTop="15dp"
        android:text="서비스종료" />

    <Button
        android:id="@+id/button3"
        android:layout_width="wrap_content"
        android:layout_height="wrap_content"
        android:layout_alignLeft="@+id/button2"
        android:layout_below="@+id/button2"
        android:layout_marginTop="24dp"
        android:text="서비스에서 데이터 확인하기" />


</RelativeLayout>
이제 각 버튼에 대한 리스너를 달아주고 서비스 연결을 위한 특별한 클래스 ServiceConnection클래스로부터 객체를 얻어와
서비스와 컴포넌트가 바인딩 될 수 있도록 준비를 하자.
아래 코드를 보면 ServiceConnection 클래스로부터 객체를 얻어와
onServiceConnected()메서드와 onServiceDisconnected()메서드를 오버라이딩한다
메서드 이름에서도 알 수 있듯이 서비스연결과 연결이 끊겼을 때 각각 해당되는 메서드를 탄다.
public class MainActivity extends AppCompatActivity {

    BoundService ms;
    boolean isService =  false;


    /**서비스 연결 객체**/
    ServiceConnection conn = new ServiceConnection() {
        @Override
        public void onServiceConnected(ComponentName name, IBinder service) {
            //서비스와 연결되었을 때 호출되는 메서드
            BoundService.MyBinder mb = (BoundService.MyBinder) service;
            ms = mb.getMyService();
            isService = true;
        }

        @Override
        public void onServiceDisconnected(ComponentName name) {
            // 서비스와 연결이 끊어졌을 때 호출되는 메서드
            isService = false;
        }
    };


    @Override
    protected void onCreate(Bundle savedInstanceState) {
        super.onCreate(savedInstanceState);
        setContentView(R.layout.activity_main);
        // 데이터를 전달할 수 있는 서비스 사용하기
        // 1. 다음 Service (*.java)를 작성한다
        // 2. Service 를 등록한다 AndroidManifest.xml
        // 3. Service 를 시작한다


        /**서비스 시작**/
        ((Button) findViewById(R.id.button1)).setOnClickListener(new View.OnClickListener() {
            @Override
            public void onClick(View v) {
                Intent intent = new Intent(MainActivity.this, BoundService.class); //다음넘어갈 컴포넌트 정의
                bindService(intent, conn, Context.BIND_AUTO_CREATE);//인텐츠,서비스연결객체,플래그 전달 -->서비스 연결
            }
        });

        /**서비스 종료**/
        ((Button) findViewById(R.id.button2)).setOnClickListener(new View.OnClickListener() {
            @Override
            public void onClick(View v) {
                if(isService) {
                    unbindService(conn);
                isService = false;
                }
            }
        });

        /**Data 확인**/
        ((Button) findViewById(R.id.button3)).setOnClickListener(new View.OnClickListener() {
            @Override
            public void onClick(View v) {
                if (!isService) {
                    Toast.makeText(getApplicationContext(), "서비스중이 아닙니다, 데이터받을수 없음", Toast.LENGTH_SHORT).show();
                    return;
                }
                int num = ms.getRan();//서비스쪽 메소드로 값 전달 받아 호출
                Toast.makeText(getApplicationContext(),"받아온 데이터 : " + num, Toast.LENGTH_LONG).show();

            }
        });


    }
}
바운드서비스를 실행하면 아래와 같은 생명주기를 가진다.
파란색 : 연결타입 서비스를 실행하면 onCreate() -> onBind() 함수를 탄다.
하늘색 : 다음 연결타입의 서비스인스턴스를 통해 내가 만든 getRan()함수를 호출하면 임의의 랜덤값을 토스트에 띄운다.
빨간색 : 서비스종료버튼을 클릭시 서비스는 onDestroy()함수를 타며 종료된다.
시작타입서비스와 다른 점은 서비스가 실행되고 있는 상황에서 서비스를 시작하면, onStartCommand()함수를 타지 않는다는 점!

다음은 실행 결과이다.

끝으로 지금까지는 한 프로세스내에서 서비스와 클라이언트가 유기적으로 통신한 것을 맛보았다. 이제 프로세스간에서
서비스를 통해 어떻게 통신하는지 알아보도록 하겠다. 원칙적으론 AIDL(Android Interface Definition Language) 인터페이스를 써야하지만,
안드로이드 홈페이지에서 Messenger Class를 이용할 것을 권장하고 있다. 바운드 서비스를 아래와 같이 수정하자.
onBind()함수가 실행될 때 익명 클래스로 정의한 mHandler를 Messenger 클래스를 생성할 때 매개변수로 넘겨주면서 동시에
getBinder()메서드를 통해 IBinder를 넘겨주어 다른 프로세스에서 통신 할 수 있게 한다.
public class BoundService extends Service {
    private static final String TAG = "BoundService";

    private Handler mHandler = new Handler() {
        public void handleMessage(Message msg) {
            switch (msg.what) {
                case 1:
                    Toast.makeText(BoundService.this, "메시지받음", Toast.LENGTH_SHORT).show();
                    break;
            }
        }
    };

    @Override
    public IBinder onBind(Intent arg0) {
        Log.d(TAG, "onBind()");
       // Toast.makeText(BoundService.this, "onBind()", Toast.LENGTH_SHORT).show();
        return new Messenger(mHandler).getBinder();
    }


    @Override
    public void onDestroy() {
        Log.d(TAG,"onDestroy()");
        super.onDestroy();

    }

    @Override
    public int onStartCommand(Intent intent, int flags, int startId) {
        Log.d(TAG,"onStartCommand()");
        return super.onStartCommand(intent, flags, startId);
    }

    @Override
    public void onCreate() {
        Log.d(TAG,"onCreate()");

        super.onCreate();

    }

}
또한 매니패스트에 인텐트 필터 안에 액션을 추가해주어 다른 프로세스에서 서비스의 접근이 가능하도록 한다.
매니패스트 서비스 선언부분을 유심히 보면.. process=":remote" 를 주목할 필요가 있다. 이렇게 프로세스에 remote를 추가 선언하면,
별도의 VM(가상머신)위에서 실행되게 된다. 이렇게 했을 경우 이점은 해당 어플리케이션이 종료가되어도 서비스는 계속 동작해야할 경우
(즉 별도의 프로세스에서 돌아가기 때문에 가능한 일. 이 일을 VM이 해준다.)
또 remote 클라이언트가 당신의 서비스에 bind 해야 할 경우 이렇게 처리할 수 있다.
<service
    android:name=".service.BoundService"
    android:process=":remote">
    <intent-filter>
        <action android:name="com.example.sqi.boundservice.service.BoundService"></action>
    </intent-filter>
</service>
이제 새로운 어플리케이션을 만든 후 액티비티에서 BoundService에게 binding을 할 수 있도록 다음과 같이 코딩한다.
버튼하나를 만들고 버튼이벤트로 binding 작업을 삽입한다.
public class OtherMainActivity extends AppCompatActivity {

    private Button mServiceCallBtn;


    @Override
    protected void onCreate(Bundle savedInstanceState) {
        super.onCreate(savedInstanceState);
        setContentView(R.layout.activity_other_main);
        mServiceCallBtn = (Button) findViewById(R.id.service_call);

        mServiceCallBtn.setOnClickListener(new View.OnClickListener() {
            @Override
            public void onClick(View v) {
                ComponentName cn = new ComponentName("com.example.sqi.boundservice",
                        "com.example.sqi.boundservice.service.BoundService");
                Intent intent = new Intent();
                intent.setComponent(cn);


                ServiceConnection conn = new ServiceConnection() {
                    @Override
                    public void onServiceDisconnected(ComponentName name) {}

                    @Override
                    public void onServiceConnected(ComponentName name, IBinder service) {
                        Messenger messenger = new Messenger(service);
                        Message msg = Message.obtain(null, 1);
                        try {
                            messenger.send(msg);
                        } catch (RemoteException e) {
                        }
                    }
                };
                Toast.makeText(OtherMainActivity.this, "BoundService에게 요청", Toast.LENGTH_SHORT).show();
                bindService(intent, conn, Context.BIND_AUTO_CREATE);

            }
        });

    }


}
이제 다른 프로세스 즉 다른 어플리케이션에서도 서비스에게 바인딩 할 수 있는 환경을 모두 마련했다.
버튼을 누른 순간 OtherMainActivity에서 서비스에게 바인딩을 요청하고
바인딩 요청에 부흥하기 위해 서비스는 onCreate() -> onBind() 메서드를 순차적으로 실행하고 전달한 메세지에 따라
handleMessage 메서드가 실행되어 메세지 처리를 할 것이다.
이상으로 연결타입 서비스를 마치겠다..
'프로그래밍 > Android' 카테고리의 다른 글
| [Android] Android Studio 검정 테마 적용하기 (0) | 2017.07.20 |
|---|---|
| [Android] BroadCastReceiver(브로드캐스트리시버) (12) | 2017.06.27 |
| [Android] 정규표현식을 이용한 Data 검증 (0) | 2017.06.23 |
| [Android] startService(시작타입서비스) (0) | 2017.06.22 |
| [Android] 서비스(Service) 전반적인 개념 (3) | 2017.06.21 |


댓글